Rubik’s Cube 3×3 Grid Solving Techniques and Satisfying Patterns
Rubik’s Cube is an important subject that many people are interested in learning about. This iconic puzzle has captivated millions of enthusiasts worldwide since its invention in 1974 by Hungarian sculptor and professor of architecture Ernő Rubik. The standard 3×3 Rubik’s Cube consists of 26 visible pieces and a hidden internal mechanism, creating over 43 quintillion possible configurations. Yet despite this astronomical number, every scrambled cube can be solved in 20 moves or fewer, a fact known as “God’s Number.” The appeal of the Rubik’s Cube extends beyond simple puzzle-solving—it has become a phenomenon in competitive speedcubing, mathematical study, and even therapeutic stress relief through the creation of satisfying vertical and infinite pattern videos.
Understanding the Basics

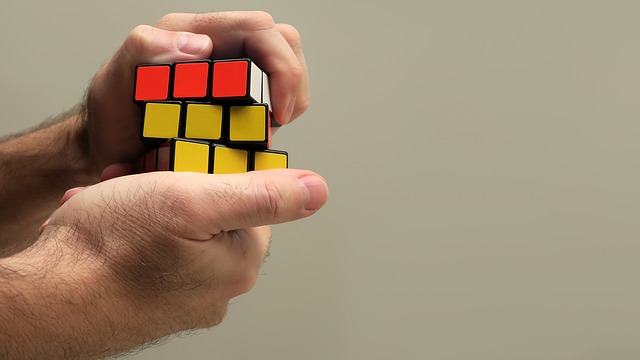
Before diving into advanced solving techniques and pattern creation, it’s essential to understand the fundamental structure of the Rubik’s Cube. The 3×3 cube has six faces, each traditionally colored white, yellow, red, orange, blue, and green. The cube consists of three types of pieces: center pieces (6 total, which never move relative to each other), edge pieces (12 total, with two colored stickers each), and corner pieces (8 total, with three colored stickers each).
The center pieces are fixed to the internal mechanism and determine the color of each face. For example, if the white center is on top, that face should ultimately be all white when solved. Understanding this concept is crucial because it means you’re not moving the centers—you’re moving all the other pieces around the fixed centers.
When learning to solve the Rubik’s Cube, you’ll encounter notation that describes how to turn each face. R means turn the right face clockwise, R’ (R-prime) means turn it counterclockwise, and R2 means turn it 180 degrees. Similar notation exists for all six faces: L (left), U (up), D (down), F (front), and B (back). This standardized notation allows cubers worldwide to share algorithms—sequences of moves that achieve specific results.

The beauty of the Rubik’s Cube lies in its mathematical elegance and the systematic approach required to solve it. Unlike random puzzle-solving, cube solving relies on pattern recognition, muscle memory, and the application of specific algorithms that manipulate pieces without disturbing already-solved sections. This methodical approach makes it accessible to anyone willing to invest time in learning, regardless of their initial impression that it might be impossibly difficult.
Key Methods
Step 1: Solving the First Layer Cross

The foundation of most beginner and intermediate solving methods is creating a cross on the first layer, typically starting with the white face. This step involves positioning the four white edge pieces around the white center, ensuring that the edge colors also match the adjacent center pieces. For example, the white-red edge should be between the white center and red center.
To accomplish this, first locate each white edge piece and determine its current position. If a white edge is in the top layer but incorrectly oriented, you’ll need to move it to the middle or bottom layer and then bring it back correctly. A common technique is to position the edge piece directly below where it needs to go, then rotate the bottom layer to align it with the correct center, and finally flip it up into place.
Many beginners struggle with this step because it requires spatial reasoning and planning rather than memorized algorithms. The key is to solve edges one at a time without disrupting previously placed edges. With practice, this intuitive step becomes second nature, and experienced cubers can complete a perfect cross in under two seconds. The cross serves as the anchor for all subsequent solving steps, so accuracy here is more important than speed for beginners.

Step 2: Completing the First Two Layers (F2L)
After establishing the cross, the next major phase involves simultaneously solving the first two layers by inserting corner-edge pairs into their correct positions. This technique, known as F2L (First Two Layers), is where beginners transition from intuitive solving to algorithm-based solving. There are 41 basic F2L cases, though many are mirror images or rotations of each other.
The fundamental principle of F2L is to pair a first-layer corner piece with its corresponding second-layer edge piece, then insert them together into the correct slot. For instance, if you’re working with the white-red-blue corner, you’ll pair it with the red-blue edge. These pieces are manipulated in the top layer until they’re properly paired, then inserted using a simple algorithm that doesn’t disturb the already-solved cross.

Advanced cubers use “look-ahead” during F2L, where they track the next pair while solving the current one, eliminating pauses between insertions. This technique dramatically reduces solving time but requires extensive practice. For beginners, focusing on accuracy and understanding why each move works is more valuable than memorizing all 41 cases immediately. Start with the basic cases and gradually expand your algorithm repertoire as patterns become recognizable.
Step 3: Orienting and Permuting the Last Layer (OLL and PLL)
The final phase of solving consists of two distinct steps: OLL (Orienting the Last Layer) makes all pieces on the top face the same color, and PLL (Permuting the Last Layer) moves those correctly oriented pieces into their final positions. This two-step process is the hallmark of the CFOP method (Cross, F2L, OLL, PLL), the most popular speedcubing method.
OLL has 57 different cases, though beginners typically start with a two-look OLL that reduces this to about 10 algorithms. The first look orients edges to form a yellow cross (if solving with white on bottom), and the second look orients the corners. Each case has a specific algorithm that flips or rotates pieces in a precise way. For example, the “Sune” algorithm (R U R’ U R U2 R’) is one of the most common and useful OLL algorithms.
PLL has 21 cases, again reducible to a simpler two-look PLL for beginners that uses about 6 algorithms. The goal is to move correctly oriented pieces into their correct positions. Common PLL algorithms include the T-perm, J-perm, and Y-perm, named for the letter patterns they create when viewing the cube. Mastering these final algorithms transforms you from someone who can solve the cube slowly to someone who can solve it efficiently and consistently, opening the door to pattern creation and satisfying solve videos.
Practical Tips
**Tip 1: Practice Finger Tricks for Fluid Movements** – Efficient cubing isn’t just about knowing algorithms; it’s about executing them smoothly. Finger tricks involve using precise finger movements to turn faces without regripping the cube. For example, when executing an R move, use your right index finger to push the top of the right face away from you, rather than using your whole hand to turn it. For R’ moves, use your right thumb to pull the bottom of the right face toward you. These techniques feel awkward initially but become natural with practice. Record yourself solving and watch for unnecessary regrips or pauses—these indicate opportunities to implement better finger tricks. Professional speedcubers can execute common algorithms in under one second thanks to optimized finger tricks that create a flowing, almost musical rhythm.
**Tip 2: Start with Color Neutrality or Choose Your Favorite Cross Color** – Most beginners always solve with white on bottom, but color-neutral solvers can start with any color, choosing whichever cross is easiest in the current scramble. This flexibility can save several moves and seconds. However, becoming color-neutral requires six times the practice, as you need to recognize patterns from every perspective. For casual solvers or those focused on creating satisfying pattern videos, sticking with one cross color is perfectly acceptable and allows faster algorithm recognition. The choice depends on your goals—competitive speedcubers benefit from color neutrality, while pattern creators might prefer the consistency of a single-color approach.
**Tip 3: Use Online Resources and Cube Timers** – The cubing community has created extensive free resources, including algorithm databases like AlgDB, tutorial videos from channels like J Perm and CubeSkills, and timing apps that track your progress. Cube timers scramble the cube randomly, time your solves, and calculate statistics like average of 5 (Ao5) and average of 12 (Ao12), which are more meaningful than single solve times. These tools help identify weak areas—if your PLL times are consistently slow, you know where to focus practice. Additionally, online communities on Reddit’s r/Cubers or SpeedSolving.com forums offer encouragement, advice, and opportunities to learn advanced techniques. Engaging with these resources accelerates learning and keeps motivation high during the inevitable plateaus.
**Tip 4: Invest in a Quality Speedcube** – Not all Rubik’s Cubes are created equal. The original Rubik’s brand cubes sold in toy stores are stiff, difficult to turn, and frustrating for serious learning. Modern speedcubes from manufacturers like MoYu, GAN, QiYi, and YuXing feature advanced internal mechanisms with smooth turning, corner cutting (ability to turn even when layers aren’t perfectly aligned), and customizable tension and lubrication. A budget speedcube costs $10-15 and performs exponentially better than store-bought versions. Premium cubes ($30-70) offer magnetic positioning that provides tactile feedback and helps with accuracy. For creating satisfying videos with smooth, infinite vertical rotations, a well-lubricated magnetic cube produces the aesthetic, ASMR-quality turning sounds and visual flow that make videos mesmerizing to watch.
**Tip 5: Learn Pattern Algorithms for Creative and Satisfying Content** – Beyond solving, the Rubik’s Cube can create hundreds of beautiful patterns. The checkerboard pattern (achieved with M2 E2 S2) alternates colors in a striking design. The cube-in-cube pattern creates the illusion of a smaller cube inside the larger one. Vertical stripes, spiral patterns, and symmetrical designs all have specific algorithms. These patterns are perfect for satisfying video content, especially when combined with smooth finger tricks and filmed from aesthetic angles. The “superflip” pattern (where all edges are flipped but in correct positions) requires 20 moves and represents one of the furthest states from solved. Creating content around these patterns, especially infinite loop videos where the pattern repeats endlessly, taps into the psychological appeal of symmetry, completion, and ASMR-style satisfaction that has made Rubik’s Cube videos viral across TikTok, Instagram, and YouTube.
Important Considerations
When pursuing Rubik’s Cube mastery, whether for speedcubing or content creation, several important considerations deserve attention. First, avoid forcing turns—if a layer doesn’t turn smoothly, the cube may be misaligned or need lubrication, not more force. Forcing turns can damage the internal mechanism or pop pieces out, creating frustration. Second, be patient with the learning curve. Most people take several hours of practice to complete their first solve, and reaching sub-30-second times typically requires months of consistent practice. This journey is part of the appeal, as each breakthrough feels rewarding.
Third, understand that different cubes suit different purposes. A loose, fast cube is ideal for speedsolving but may be too uncontrollable for beginners. A tighter cube provides more stability for learning but limits speed potential. Many serious cubers own multiple cubes set up differently for various purposes. Fourth, when creating satisfying video content, lighting and camera angles matter enormously. Overhead angles showcase patterns beautifully, while close-up shots with good lighting highlight the smooth turning and color transitions that make videos satisfying to watch.
Finally, be mindful of ergonomics and hand health. Extensive cubing sessions can strain fingers, wrists, and hands, especially when learning finger tricks. Take regular breaks, stretch your hands, and listen to your body. The Rubik’s Cube should be enjoyable, not painful.
Conclusion
The Rubik’s Cube represents a perfect intersection of mathematics, art, and physical skill that continues to captivate people across generations and cultures. Whether your goal is to achieve lightning-fast solve times, create mesmerizing satisfying videos with infinite vertical patterns, or simply enjoy the meditative flow of solving, the journey offers endless rewards. The techniques covered here—from the fundamental cross and F2L to the advanced OLL and PLL algorithms—provide a solid foundation for any cubing pursuit.
Remember that every expert cuber started exactly where you are now, facing a seemingly impossible puzzle. The difference between them and beginners isn’t innate talent but persistent practice and willingness to learn. Start with the basic layer-by-layer method, gradually incorporate algorithms, develop smooth finger tricks, and explore the creative possibilities of pattern generation. The satisfying click of magnets, the fluid motion of a well-lubricated cube, and the visual pleasure of colors aligning into perfect patterns create an experience that’s both intellectually stimulating and deeply satisfying.
As you progress, you’ll discover that the Rubik’s Cube is more than a puzzle—it’s a tool for mindfulness, a creative medium, and a gateway into a welcoming global community. Whether you’re filming the perfect infinite loop for your satisfying video compilation or competing in your first speedcubing competition, embrace the journey, celebrate small victories, and enjoy the timeless appeal of this colorful, endlessly fascinating 3×3 grid of possibilities.